 |
| This is not my office but it is similar |
This is the final outcome of the project. The LED turns off in the presence of static and reading are also being sent to a web server over WIFI.
The Circuit
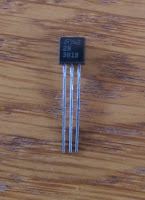
- A field effect transistor (FET) similar to that mentioned in the article. I chose this one as it was easy and cheap to get hold of from ebay. I bought a bag of 5 for less than £3.
- An LED
- A breadboard (unless you want to solder the components together
- 3 wires
- A Photon
 |
| Hook the components up like this |
Here is the slightly modified circuit from the article. The main differences are the addition of the green wire to feed the readings back to the photon and the ordering of the pins on the FET. I couldn't find anywhere to buy the FET mentioned in the article in the UK so I bought a bunch of similar ones from ebay. Whichever one you use, just make sure the positive wire is connected to the source and the LED is connected to the drain. The datasheet for the FET you use will tell you which order the pins are in.
We will use a digital pin for the power rather than the 3v pin as we want to guarantee a stable voltage to get accurate readings. The power pins fluctuate more than the digital pins pulled high.
The Software
I have uploaded the project containing the photon code and the web server on github here. Compile and flash the contents of src/main/cpp onto the photon and run the scalatra web server as specified in the README instructions.
Generating static
Power up the photon and experiment in holding different items near the FET antenna. I found the most effective test was to run a comb through my hair and hold it close.
 |
| The LED is on, no static is detected |
One thing I found interesting was that it totally stopped working when I tried to generate static with slightly wet hair (I couldn't be bothered to use a blow drier today). The circuit just wasn't picking up any negative charge at all and I thought maybe I had broken the FET. But then I remembered that someone suggested using humidifiers in the office to combat the static, so googled for how the presence of water affects the generation of static. Long story short, water allows the electrons to move back to where they were originally pulled from (due to the extra conductivity) so the comb was never coming away from my hair with any extra electrons attached, so there was no negative charge.
If I had some balloons handy I would test this by rubbing one against a damp jumper to see if this also shows the same behaviour (presumably it would).
Software is very interesting on it's own, but adding hardware into your projects allows you to investigate simple scientific principals too, which makes computing even more awesome. Yey, science!


No comments:
Post a Comment